Follow Me on Pinterest
Instead of posting links to Making Do Ideas on this blog now (I'll just post my own projects here though they are few and far between now), I'm now posting them on my Pinterest Board named Making Do Stuff.
You do not have to have a Pinterest account to see it.

Wednesday, December 31, 2008

Turkey/Chicken Leftover Tortilla Soup

I had extra turkey leftovers from the holiday. (Who doesn't have leftovers?) After a few sandwiches, I was down to the dregs, maybe a cup of shredded turkey. So, Leftover Tortilla Soup was in order.

Quick Easy Creamy Tortilla Soup (Less than 15 minutes)

1 can of diced tomatoes
1 can tomatoes and chilies (Or a substitute for tomatoes and chilies is 1 cup salsa if you do not have this on hand)
1 can refried beans
3 1/2 cups chicken broth
1/2 to 1 cup corn (frozen, fresh, canned, whatever)
1 lb cooked chicken or turkey (or whatever you got left!)
shredded cheese
tortilla chips

Stir tomatoes, salsa, beans, broth and corn in a large pot. Bring to a boil. Reduce heat and add meat until heated through. Ladle into bowls and top with cheese and crushed tortilla chips to liking.

I ladle serving sizes into freezer bags and freeze for later since this makes too much for my family to eat in one sitting. I have fallen in love with making soups lately. We will eat what we want and then I ladle in our portions into bags which freeze nice and flat. Pull out of the freezer, place it in a sink of hot water to soften enough to get it out of the bag and zap it in the microwave.

Tuesday, December 30, 2008

Close the Dryer Door

Is your utility room cold? Do you close the dryer door after you are through using it? If not, do so, otherwise you have given cold air direct access into your house.

My utility room is exceptionally cold this year, and I knew I was able to keep it warmer last year. One, my breaker box really needs to be redone and insulated, but for now I replaced the shipping tape "sealer" around the edge where it meets the wall that hubby forgot to tell me he ripped off when changing some breakers.

Then when it was still cold, I had to think for awhile and then realized it was my wide open dryer that was continuing to make it cold.

Monday, December 29, 2008

Yarn Padded Hangars

My great grandma used to always make yarn padded hangars throughout the year and give all of her grandchildren a bag full for Christmas. These are so easy that she even did them after she went blind. Use your scrap yarn for these even your little pieces for your own closet, who cares what they look like?

I gathered up some scraps, I started with the bigger ball and didn't even finish it so it doesn't take very much. Tie on the yarn at the top of the hangar.

Now a crochet pattern would probably be written like this:
BEG, Take needle under hangar, yo, bring above hangar, yo, draw through. Then HDC around the hangar until done.

If you don't normally crochet, this isn't very difficult. Here are pictures to guide you. Grab a crochet hook. Grab onto your needle the yarn from under the hangar and pull back up to the top.

Then, put the yarn above the hangar over your needle and pull that through the "loop" that was already on your needle. Now you have a real loop on your needle.

Now you are going to "yo," yarn over meaning while your needle is above the hangar wrap the yarn over your needle.

Next, pull your needle down in front of the hangar and pull your yarn down behind the hangar and grab the yarn with your hook or "yo."

Now bring both the needle and yarn back up, yarn in behind, needle in front. And yarn over again.

Now you are going to draw through. Take that last piece of yarn you grabbed with your hook and pull it through the three loops that are on your hook. You are back to square one with one loop on your hook. You just did a half double crochet around the hangar.

Now continue this ad naseum scrunching up the yarn as you go, do not worry about getting it tight on the hangar, the padding is better when you do it a bit loose. Tie off when you get to the other side and you have a nice padded hangar for the closet to help keep funny dents off the shoulders of your blouses and strappy shirts from slipping off.


Friday, December 26, 2008

Lemon Juice Microwave Cleaner

Sometimes it pays to read every word that comes in front of you. I was reading all the fine print on the lemon juice bottle as I was making a pie and it said to heat 1/2 cup of lemon juice in the microwave for 3 minutes and then the lemon juice steam will clean the microwave off. I definitely had a great microwave to test this on; I honestly can't remember the last time I cleaned it (is anyone recognizing that I am a horrible house cleaner through these blog posts yet?). If that wasn't the easiest time I have had cleaning the microwave, then I don't remember.

Plus, the smell emitting from boiling the lemon juice in the microwave gave the kitchen a wonderful lemon smell that made it seem as if I had cleaned the kitchen with Pine Sol.

Thursday, December 25, 2008

Recycle Your Greeting Cards for a Good Cause

Merry Christmas!

Over the next few days as you clean up after your merry Christmas mess, don't throw away your Christmas cards. If you aren't keeping them, consider donating them to St. Jude. They have the kids at their ranch recycle them and sell them to help other children at St. Jude's.

In fact think about organizing your office, school or church to bring in all their cards and send them to St. Jude together.

They take other kinds of cards as well.

Consider buying your next cards from them.

Here is the directions and address to send your cards.

Wednesday, December 24, 2008

Wool Leggings

Somehow I stumbled upon a leg warmer site, babylegs, awhile back. Didn't realize these things were popular nor used on teenage arms.

But, I used to want something like this when my kiddo was tiny. You know the stage where you are changing their diaper every half hour or more. I got tired of pulling off pants, but with the diaper covers I make without side openings, because I am a lazy no good sewer, you had to completely pull them off. So during the winter, I put my thin little socks on her so that she wore them like thigh highs, so I could change her diaper, not take off pants and keep her legs warm.

So, that snow suit I made out of two wool sweaters left me with some skinny sleeves. I am sure any shrunken wool sweater sleeves that don't have enough material to become Diaper Cover Longies will make fine leg warmers.
I chopped it off even and...

Viola! Leg warmers. I am sure they are just as capable of being worn on your arms as they are on my baby's legs if you have the desire.

My model was getting a little weary of modeling. Please ignore stressed out facial features; they were not caused by the leg warmers.

Tuesday, December 23, 2008

Wool Sweater Toddler Snow Suit

So last week's snow was fun; I bundled the kiddo up in so many layers that when she fell into the snow she couldn't hoist herself back up, yet when we returned to the house, she was soaked all the way through. So, since they make such good diaper covers and mittens, I figured a wool snow suit would be a great addition to those layers and should keep the damp from penetrating to her skin.
I took two wool sweaters that had shrunk very much, I don't think they were large sizes to begin with. Nice theme of stripes.

Then I took the next size up sleeper pajamas to use for a "pattern." Wonderfully, the sweater was about the same size so I didn't have to bother with altering it that much. The one with the hat won for being the top, plus the cleavage plunging slit answered my need for how to get her into the snowsuit without having to create a zipper/button/velcro opening. Less sewing for me makes me happy.

Now here is where planning would have come in handy. To match the length of the arms, I cut out a section of the sleeve to shorten it, but then later decided that I didn't want her hand poking out, but was going to just close it off. So I made myself some extra sewing. :( But if you did want the hand to be able to exit the sleeve, then I would shorten it this way to leave the pre-knitted wrist band at the end.

Then I took the other sweater and turned it upside down so the waistbands of the sweaters met. Then I cut out the legs using the pajamas as a pattern.

Then I sewed the sleeve back together and sewed the sleeve shut in a circular fashion making a built in mitten.

I first turned the legs inside out and sewed them back up.

Next, I took the two pieces inside out and pinned them together so that the seam folded into the inside of the suit.

Then I sewed the pieces together.

Do or die time. Could I get it on? Would it fit? My lovely model sports the newest fashion in remade winter clothing.


UPDATE: You do have to have the next size shoe up to be able to cram kiddo's foot into a shoe with this snow suit if you also have socks on underneath.

Monday, December 22, 2008

Frugal Present Wrapping

I really didn't want to buy Christmas Wrapping stuff. So, first, I got out all the kept Christmas bags and tissue paper- One bag per person regardless of amount of presents. But there wasn't enough. So, some generic Birthday bags were chosen and two presents got wrapped with tissue paper and curling ribbon.

I also had no tape! What to do? For the tissue paper presents, they are taped up with packing tape and for the little name tags that I made out of the paper that the Dollar Tree uses to wrap up glass, I scrounged old tape off of the gift bags!


The picture of me searching for the invisible markings that indicates old tape on a bag makes me giggle.

Friday, December 19, 2008

Wool Sweater Toddler Mittens with Cord

So now that I have mittens, it was time for the two year old to have mittens. I decided not to worry about a thumb, she just needed her hands warm. You could easily do a thumb if you wanted to. So, I grabbed another set of sleeves that has shrunken way down. You never know how a sweater is going to shrink and this one shrunk so much that it looked like only Olive Oil would have fit in those sleeves. Then I also took two strips of another sweater about two inches wide for I am going to make a cord to keep on the mittens. Do you know I haven't been able to find ready made gloves for kids that have that feature anymore? Probably has to do with choking safety standards, but I want mine to have that. I survived with them, I bet she will too.


Then I cut and then sewed across the inside out mitten piece in a circular pattern.

Then I trimmed the excess.

Then I sewed the "cords" closed.

Then I turned the cord inside out. Make sure you make it wide enough to shove your finger in there. I sewed my two cords together to have a long cord.

I decided that I didn't want to make a cord for every pair of mittens I make for her, so I decided that I was going to make the cord work for any and every pair she has using buttons. So, I made a button hole on each glove.

Then I sewed on buttons to each end of the cords so that they could attach in this manner. That way if the kiddo came in needing new mittens after a few hours of snow play, we could change out the gloves without taking off the coat.

And so here is my lovely model to show off the finished project. The cord was astronomically too long, so I just tied a knot in it behind her back; therefore, it is an adjustable cord as well as reusable! :)

Thursday, December 18, 2008

Wool Sweater Mittens

We had 3 inches of snow a few days ago and the hubby told me on the way out to work that I needed to take the kiddo out to play in the snow. Why does he tell me this? Because in winter I hibernate and hardly leave the house when the kiddo loves outside. So, I bundle ourselves up. I had lousy driving gloves and she had socks on her hands. This just didn't cut it. So first order of business was to make me some wool mittens.

I sorted through my stash of shrunken sweaters for some that still had the sleeves.
I placed my hand on the sleeve leaving quite a long length of sleeve past my wrist, I hate it when snow gets up into my glove because I can't tuck it into my sleeve.

I then cut out a mitten "pattern" with quite a bit of seam allowance.

Then I turned them inside out.

Then I sewed them up!

I evened up the seam extra (is there a technical term for that?) so it wouldn't annoy me.

I am sorry I don't have an after shot, but I went outside to grab snow with them and left my flash on, so flash plus snow meant absurdly white picture. Anyway, I squeezed snow in my hand for 45 seconds and while I did register cold, I just brushed the snow off. There were a few water droplets on it, but very good hold up, and as hubby always says, "Wool is the only material that retains its insulating properties when wet." Anyway, looks like they'll do for snow fort building and took me less than 5 minutes to make.

Now I am off to make some for the toddler with a cord so they don't get lost.

Wednesday, December 17, 2008

Goat Shed Shelter Plans

My post on how I used scrap lumber to put together a goat shed has generated a lot of views. Evidently people want to find some instructions on how to build goat sheds with scrap lumber!

Well, since I just pieced it together, there was no "plan," but in the interest of helping, I drew up a "plan" based on my finished product.

Hope this is clear enough to help! Click on the picture and print it if you would like. It has no dimensions because it was based upon the scraps I had, so you would have to base it upon the scraps you have!


Tuesday, December 16, 2008

Bonus Link - Christmas Ornament - Yarn Wrapped Cookie Cutter

Use up that scrap yarn to make a cookie cutter ornament for the tree.

Feed Bag Tough Trash Bag

Don't throw away cat, dog, goat, chicken, whatever animal you feed, food bags. They are awesome to use as a heavy duty trash bag. I just took my empty goat pellet bag and picked up a bunch of splintered wood with nails in it and not one tear! Save these for those horrible jobs that involve nails, broken glass or pottery, or metal poking things.

Monday, December 15, 2008

Bonus Link - Christmas Ornament - Felted Wool Roses Ornament

I absolutely love the fact that she didn't have a Styrofoam ball so she made one from scraps to pin on her felted wool roses for an ornament.

That Chocolate Cake in a Mug - Wrap it up!

Most everyone has probably received the email of the "Most Dangerous Chocolate Cake in the World" Chocolate Mug Cake. How many of you have tried it?

In case you haven't, here it is:
5 MINUTE CHOCOLATE MUG CAKE

1 Coffee Mug
4 tablespoons flour(that's plain flour, not self-rising)
4 tablespoons sugar
2 tablespoons baking cocoa
1 egg
3 tablespoons milk
3 tablespoons oil
3 tablespoons chocolate chips (optional) some nuts (optional)
Small splash of vanilla

Add dry ingredients to mug, and mix well . Add the egg and mix thoroughly.
Pour in the milk and oil and mix well.
Add the chocolate chips (if using) and vanilla, and mix again.
Put your mug in the microwave and cook for 3 minutes on high.
The cake will rise over the top of the mug, but don't be alarmed!

Allow to cool a little, and tip out onto a plate if desired. EAT!
(this can serve 2 if you want to share!)


We just did. It's decent. Since I don't have enough people in my family, I hardly ever bake a cake for it goes bad before it is gone, or we feel obligated to eat dessert every time we pass it to keep from wasting it (Not good for the waistline!). So, this will fill the craving every now and then that we have for chocolate cake - we ate it hot with ice cream on it - everything is better with ice cream!

Anyway, for Christmas, I plan on wrapping up the dry ingredients for this mug cake and the dry ingredients for hot cocoa in two cheap mugs with instructions along with a new oven mitt. $9 plus ingredients. Minus the fancy oven mitt, I thought this might be a good office, teacher or extended family gift.

Now, my question is, what other things can I make in a mug? I'm sure I could do an apple crisp, I probably have no hope of making an angel food cake which is my favorite.

Friday, December 12, 2008

Bonus Link - Christmas Ornament - Cookie Cutter Frame

Martha Stewart has a great idea of backing a cookie cutter with a picture or scraps.

Reader Suggestion Friday- Reuse those glass jars

Anonymous wrote me! The suggestion was to remind us not to throw away those glass jars that come with jelly, pickles, etc. but reuse them for drinking glasses.

My grandma always had jars to drink out of. It's also pretty cool if you have a country themed kitchen/dining room to use those jelly jars with embossed fruit and words on the sides for your drinking glasses.

Of course, you can reuse them for putting in dried goods. Like, when I get to the bottom of a cracker box or rice bag, instead of keeping them in bulky packaging, I transfer them to a jar. Since it is clear, it gives me a visual reminder to use it, and it's prettier!

Reader Suggestion Friday is a new installment for this blog! If you want to share a way you reuse things, look in the side column. I have put in a Reader Suggestion area where you can email me to show off your reusing/crafty/frugal ideas with my readers.

Thursday, December 11, 2008

Bonus Link - Christmas Ornament - Fabric Ball

I had determined to only make ornaments with what I have around the house. Unfortunately, I don't have a Styrofoam ball otherwise, I would be using up some of my scrap fabric to make these easy fabric ball ornaments. Nice Tutorial here.

Christmas Ornament - Juice Lid Silhouette

Do you save juice can lids? Have you seen people make Victorian ornaments by gluing on a greeting card and trimming it with lace and ribbon like this?

Well, I have also seen people have their kids glue on their school photo and decorate.

I wanted something in between, Victorian, but a memory of my child. So I decided to make a Silhouette Victorian Ornament.

In Jane Austen days, making silhouettes was often great fun. Here is how to create one a la Jane Austen.

Then you would use a pantograph to enlarge or reduce it. For real fun, make a pantograph. Or you can be modern and just use your computer and some scanning software or fancy printer to shrink it.

Well, I didn't do either because I have a 2 year old who I am not about to ask to hold still to be drawn! So I looked through photos of her and found one I had taken that had a good profile.

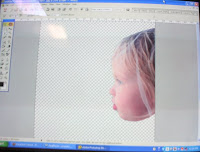
Then I put it in my photo software and cut out her profile.

Then I cleaned it up a little bit.

Then I blacked it out. Then I reduced it to a 2 inch square and fudged and made the back of her head. It will do; can't wait until she is old enough to sit still for a real one!

So, I printed it out and cut it out.

I gathered up ribbon, trim, lace, juice can lid, silhouette and toddler foot.

Since I wanted to center my silhouette, I ended up cutting it out. I had to make a new background for my ornament by tracing the lid and cutting it out.


After gluing on the silhouette and background, first put on the lace, you will have to scrunch it as you hot glue along so that the lace will lay nice and flat around the ornament instead of caving backward. Then I put on the trim and ribbon hangar.


The final touch was the year and name of my child. However, I am in a time vortex as I just now see I wrote 2006! Thankfully "6" is easily converted into "8."

Wednesday, December 10, 2008

Dog House or Animal Weed Bedding

I have found a great reason not to mow. Do you have a field, ditch or for that matter lawn that looks like this?


Well, then for the winter, grab handfuls of it and line your animal house with it to keep them warm. Don't bother paying for hay.

Tuesday, December 9, 2008

Stalker Phone Change Options

If you are blessed with a stalker who doesn't take the hint that you don't want them to call or write, like my hubby is blessed, there are 2 options to keep him or her from calling. (You can just mark refused on the mail you get prior to opening and send it back).

You can either get caller ID and call block or you can get an unlisted number. Check the prices with your phone company. If you have an unlisted number, they should not be able to pay for your phone number on the internet, and if you have call block and id, you can program your phone to not take that person's call. My company charges $10 for the change to block/id and $8/month. For unlisted the change costs $10.25 and $.50/month. Not only is it cheaper for me to get the unlisted, but I don't have to worry about the stalker getting wise and changing her number as well. (Of course, if you want to have people be able to find you in the phone book, this would not be an option.)

Monday, December 8, 2008

Got a Free Blockbuster Movie

Hmm, I was given a call by a blockbuster employee reviewing records who saw that I hadn't been in for a while (maybe 6 months) and to encourage me to come in, she put a free rental on my account to be used in the next two weeks.

I normally borrow from friends or the library or the church library, maybe one or two a month.

Hmm, I wonder how often they'll do this? I really have such little time for movie watching I think one every six months for free from Blockbuster would be just fine with me! :)

Surger Scrap Stuffing

I got myself a newish surger; I am so excited! I just fixed all my unraveling diapers where I was too lazy to zigzag stitch them properly. If I knew how great these things were for a lazy sewer like me I think I would have looked harder for one sooner!

So, I went through the pile of diapers and fixed the ones needing fixed and just about picked up the scrap fabric and threw it away when my frugal mind rebelled. I heard this little voice saying, "You can use that for something; think!" Stuffing! So, now they have been given a designated bag to stay in to accumulate until I have a pillow or animal to stuff. I mourned the past t-shirt scraps that I have previously thrown away for a second, but I recovered.