Follow Me on Pinterest
Instead of posting links to Making Do Ideas on this blog now (I'll just post my own projects here though they are few and far between now), I'm now posting them on my Pinterest Board named Making Do Stuff.
You do not have to have a Pinterest account to see it.

Saturday, January 31, 2009

The Frugal Deep Edge

You know when you have made it over the frugal deep edge, when your mother comes to visit and keeps trying to talk you into buying you things:

Is that what you use for napkins? Would you like me to buy you paper towels?

Is that what you use for kitty litter? I can buy you kitty litter.

Do you have any soft scrub? No? Use Baking Soda? Here's $10; buy me some soft scrub.

:)

Friday, January 30, 2009

Washing Soda for Greasy Dishes

Well, I have finally figured out how to get the oils off my greasy dishes finally. I have never had such a hard time doing this anywhere else I have lived; I think there is something strange with this rural water. I have tried all kinds of things: changed dishwashing soap, added boiling water, added bleach (this works semi-decently, but kills my hands), washed with fireplace ashes (aka lye), and on and on. But my dishwater still looked like this. And no plastic thing came out of there non-slippery. It has really truly annoyed me.

So I was reading an excerpt out of an old 1900s book titled something like "Teaching the Bachelor how to care for the home." Fun stuff - stay-at-home Mrs. Cleaver type lady explaining to bachelors how to care for the house - something that would teach me a great many things I am sure. It said something like, "If you have really greasy dishes add some washing soda to the wash, just make sure you rinse well use gloves or wash your hands afterward to keep your hands from drying out."

I just bought washing soda for the homemade laundry detergent I made. So off I went to try this out. And it works! I put in a very small shake of washing soda and a small squirt of dawn and my plastic feels like plain old plastic again. I am so happy! I have used it for three weeks now and I believe I have finally beat the grease monster. I don't use gloves since I hate washing with them. I have forgotten to wash my hands afterward and they do get a little dry, so it dries out your hands if you let it sit on there.

I keep an old Parmesan shaker full of washing soda next to my dishwashing liquid to help me shake just a little into the sink.

Thursday, January 29, 2009

Leftover Cereal Flour

We love Mini-Wheats. I grew up eating cold cereal for breakfast, and I still do to this day; it's a habit. I have a stack of them, and anytime it goes on sale my stack gets bigger. (I am currently playing with making my own oatmeal to cut down on this cost)

But with Mini-Wheats (and with other brands of cereal), there is always huge amounts of crumbs left over. Up to a quarter cup with these things!!


So, I got to thinking. If I save the leftover cereal crumbs, what could I use it for? Substitute flour! (with some sugar and maple flavoring). So I store the crumbs in a peanut butter jar. It is full in less than 2 weeks.


I have substituted the cereal crumbs for flour in two recipes so far and it works. I spin it through the food processor if I desire (although I have skipped this step with no ill effect) and substitute it for flour in a recipe that is sweet. I have so far put it in my granola bars recipe and they are as yummy as ever. And I have done it in banana bread. It did make the banana bread darker than the normal banana bread usually is, but my hubby gobbled that stuff down faster than I have ever seen him eat banana bread.

You could do half flour and half cereal flour, but so far, I have substituted 100% of the flour with leftover cereal flour in these two treats with no ill effect except for the bread looked dark. I am sure it will work in others. I will update this when I test it in other things.


Wednesday, January 28, 2009

Duct Tape Dress Form - Bonus Link

I have bought several clothing items from thrift stores that I want to refashion, but pinning on myself doesn't work so well.

So my mother was going to help me make one with duct tape, t-shirt and saran wrap per instructions on this site, but she decided to splurge and by a dress form so she could use it too.

I still may end up doing the duct tape dummy and put it over the dummy and pad it to make custom fits if I ever get really serious, but most of the things I am planning on "refashioning" are minor tweaks and I don't look too different than the model. But who knows if I will get to it now that I have one; I have other things to do!

I thought I would share so you can do it. Tell me if you do, looks like fun!

Replacing Lost Buttons

So, you know how to sew on a button, but you have lost it.

One thing to do as a preventative measure is to take a pill bottle or some small kitchen container to designate for the extra buttons from new purchases. Often when you buy a garment, there is a little ziploc bag with a button in it. But you need to know where it is years later when that button falls off, so stop and decide where you are going to store all those buttons from now on, so you can find them when needed.

But either the garment didn't come with extras or you can't find the extra button. Going to the sewing store will likely cost you $2 to $5+ dollars for a few buttons possibly like your style of buttons. Not very cheap. And if you buy clothes from the thrift store anyway, may cost more than you paid for the item to begin with.

So, head to the local thrift store that sells clothing cheaply (almost all the ones around here sell their garments for $1). Search in any size clothing for buttons similar to yours. Whether or not it fits, has stains, or is ugly as sin, if you can find a similar button, you have saved money and have others to spare.

Take it home and lop off all the buttons (putting the extras in your button storage) and get to mending! Throw the buttonless clothing item in the rag bag or scrap material pile.

Also, if you are about to throw a pair of pants or button up shirt in the rag pile, steal its buttons before you do so. Buttons come in handy for repairs or crafts.

Tuesday, January 27, 2009

Light Bulb Vases - Bonus Link

Absolutely Lovely recycling project!

A hanging Light bulb flower vase.


Darn Those Socks

When a sock gets threadbare, I throw it in the rag pile, but when hubby's big toe nail slices a hole in the toe area, darn it. It would be silly to throw away a good sock for a small hole. Now I have a Needlecraft book from the 70s that gives good illustrations, but since I don't want to get in trouble for photocopying, here is a YouTube video on how to darn a sock. If you don't have a sock darner (or they have a fancy "mushroom") use a light bulb or a potato or some other similar smooth shaped knickknack. This is very detailed all the way through, you'll get the idea half way through, it's just like weaving.


I have just been using regular thread to darn hubby's socks which is really thin; I ought to get some heavier thread, but I'm too frugal to buy any when I inherited all the grandmothers stashes of boxes of thread.

Monday, January 26, 2009

Mend Clothes

Seriously, I have bought beautiful clothes at the thrift store which I am assuming was just given away because the hem fell out. Big rips of course may look awful mended, but the time and effort of mending an unseen tear, sewing up a split skirt split, sewing back on a button, stitching back up a fallen hem costs way less than replacing the item.

You don't need a sewing machine to do so, just a needle and thread.

If you want someone to show you how, you can watch these videos:

How to sew a button

How to sew a tear

How to sew a hem without a machine

Friday, January 23, 2009

$1 Bag Thrift Treasure Day

I go to thrift stores when I need something, but I have a great thrift store that periodically has $1 bag sales and then 3 bags for free days (usually quarterly). They also have a hall of free stuff. They clean house and then I get to play! I generally use this day to collect "fabric" and fun things that I wouldn't really desire to pay for. This was my $1 haul yesterday - I get good at squishing things into a bag so I don't use more than the change hubby leaves scattered on the van floor.

1 air corn popper - Christmas present of popcorn seed and no easy way to use it, now I do.
4 wool sweaters - fabric
3 casters - maybe can fix broken shop vac wheel
lotion dispenser - soap dispenser for downstairs bathroom
3 pairs of pantyhose - hubby wanted old hose for making a shooting gun rest but I don't really wear them, so I squished these in
sparkly dance uniform tube top - 2 year old dress up
large blue bag - to convert into lap top case or at least to steal the straps and zipper from if too small
red frilly shirt - to be refashioned into play clothes dress
lacy baby dress- has stains but is for black and white old timey photos with future child subject maybe
gray dress - love the neck, will refashion into a shirt for me
black shirt/white shirt - My bathroom has old photos theme and I want to set my family up like an old photo. Hubby can wear white oxford, suspenders and black slacks, but my outfit will be harder. Both of these old out-of -date shirts will work, gotta make a skirt. I actually kinda like the white one, might just wear it.
3 denim items on free rack- fabric

Water Heater Insulation Blanket

I installed a water heater insulation blanket on my water heater. I put one on the last house and noticed that it seemed that the water heater was able to maintain and reheat faster. We did this because in the winter it seemed that the hot showers kept getting shorter and shorter and the length of time we had to wait between showers so the next person could have a hot bath was getting longer. I am sure it saves energy and money as well. Both of out heaters have been located on a porch/utility room type area that is colder than the rest of the house.

It is quite simple to put up.

At your hardware store near the water heater stuff or weather stripping stuff, you can find a water heater insulation blanket (this one has an R factor of 5).


A few minutes later, your water heater is snuggled up in its blanket.

Thursday, January 22, 2009

Homemade Reusable Fabric Softener Sheet

I hang my laundry out to dry usually. (The best way to avoid static cling.) But on occasion I dry them in the dryer, like when hubby does it, vacation packing time, or too much to do to hang inside on drying racks when yucky outside, etc.

To keep from getting static cling you have to avoid over drying, for dry clothing rubbing against each other (friction) is what causes it. Setting it on the dampness sensor can help and adding a fabric softener sheet to the dryer can help too. Also, not throwing wool socks, polar fleece jammies, and anything else that usually attracts static (i.e. dries faster than the rest of the clothing) in the dryer and drying them separately on a rack helps tremendously.

Make your own reusable fabric softener sheet. Take a washcloth that is identifiably different than the rest of your towels and cheap conditioner. I either use the free conditioner I get from Walgreen freebies or large dollar store bottles.


Put in a baby wipes container one part conditioner, one part water. Make sure you are ok with your clothes smelling like the conditioner.


Put the washcloth in the container of liquid, wring it out and throw it in with the clothing. You can use this a few times before re-wetting it.

I have heard of people using vinegar and baking soda in the wash as a softener and I have tried it, but my hubby thinks he can smell the vinegar and it causes him to have a rash and to me they line dry worse with it, so I don't use it. Perhaps, in the dryer it helps, but since I rarely use the dryer, I choose to do the fabric softening in the dryer when it is used.

Wednesday, January 21, 2009

Toothbrush Cleaning Brushes

Don't throw away your old toothbrushes; save them in your cleaning supplies. I have cleaned countless things with my toothbrushes and I like the fact that if they get truly nasty, (like when cleaning a small engine part from some caked up oil) I can throw them away without feeling like I ought to clean them so I can reuse them again.

My absolute favorite thing to clean with them is the gunk that gathers where the faucet meets the sink.

Tuesday, January 20, 2009

Lowest Wireless Cell Phone Cost for the Emergency Cell Phone User

We rarely have any use for a cell phone, when I was about to have a baby my hubby took one to work and while we are traveling have been the only real times we use it. Otherwise, it sits on a counter.

My old tracfone from 3 years ago died. It's a nightmare to get Hong Kong or whoever it is that answers the phone to replace it (I had to do it 3 years ago, replacing the previous one that I owned for about 3 years as well - seems the tracfone has a life of about 3 years?) and decided to forfeit the time on it rather than deal with that again.

So on a day last week when I didn't have a toddler with me, I ran around town, looking for the best deal for the non-cell phone user who wants one for emergencies. I wanted the best deal for someone who will go months without using it, but doesn't want to buy minutes and lose them and get a new phone number if I let the time run out and would average 3 days use of the phone a month using only a handful of minutes.

I visited the cell phone shops but to have a contract cell phone from anywhere will cost no less than $30/m even if you never use it.

Then I sat down with a display of all the pay as you go cell phones. Tracfone, Go Phone, T-Mobile, Net 10, Alltel Prepaid. I wish I had the forethought to write all the stuff down, so I could put it here, but I didn't. I am doing this all by memory, so if I get a detail wrong, don't shoot! I sat myself in the aisle and did lots of math on the back of receipt paper to find the best deal.

The only ones that didn't charge a fee for daily use plus minutes for use was Tracfone and Net 10 and Go Phone (I think Go Phone had the option of a daily fee or a higher minute fee), so they were cheaper than the others.

Then between the three, Go Phones large minute fee ruled it out quickly, Net 10's smallest card expired in 60 days, whereas Tracfone's smallest refill card expired in 90 days. AND the new tracfones now all come with double minutes for the life of the phone.

So Tracfone ended up being the cheapest. A 60 minute card for 19.88 which is doubled to 120 minutes equals 17 cents a minute. I won't use 60 minutes in 3 months, so it will cost me $6.63/m to own the tracfone.

Then I had to decide between the $10 model and the $20 dollar model. The twenty dollar model came with case, cigarrette lighter plug in and hand free headphones. I can't tell you how many times I do end up taking my emergency phone with me to find out my battery is almost dead, so I looked how much it would cost to buy the cigarrette lighter adaptor separately - $13.66. So, I bought the package.

I think if I had a kiddo of cell phone age, I would buy this bare minimum and if they wanted extra minutes it would be from their pocket. You can wait til you get home to call your friends, honest.

Monday, January 19, 2009

Making Produce Last Longer - Crisper Humidity Controls

I have a two door crisper in my refrigerator that has knobs to control humidity.

So, I set out to find what should go where so my produce will last longer.

High Humidity:
beans
leafy veggies
asparagus
celery
cucumber
broccoli
green onions
berries
pears
mushrooms (should be stored in a brown paper sack)

Low Humidity:
melons
tomatoes
citrus
garlic
onions
gourds

Then to remind me, I wrote them on sticky labels and attached them to the drawers, so I and the rest of the household will put the stuff in the appropriate drawers.

Friday, January 16, 2009

Use a French Press and Stop Buying Coffee Filters

I have my step father to thank for turning my husband into the Coffee French Press Evangelist.

If you have never drank coffee from a french press, most likely you will really like it. I can't count the number of people that he has shared his coffee with that has changed over to a french press. Doesn't seem to matter what their favorite coffee is, put it in a french press and it tastes better.

(I can't vouch for this since I think all coffee tastes like dirt water.)

Anyway, since we live in the middle of nowhere, it has fallen upon my shoulders for a handful of Ross's coworkers to buy one for them for the cheapest deal.

The Progressive 4 cup coffee press was the cheapest to buy plus shipping from Kitchen Collection. This is as of last year, haven't searched since then.

My hubby had the Progressive one for 2 years and then it broke when it took a tumble from the counter. He bought a bodum "the original" French Press which is about $10 more expensive, but he feels it is better made and you can buy replacement parts. The one drawback is that you can't get a programmable one since that would be impossible, but he considers the taste worth the time.

Why do I like this? I don't have to buy coffee filters ever again.

Thursday, January 15, 2009

Reupholster Your Lamp Shade

I did this project before the blog, so I don't have before pictures, sorry. I did a different one later with process picture.


My husband came into the marriage with lots of junk! One was this lamp. Great base if but a bit gaudy and a terrible dust collector:


But the lamp shade was a pink silk paisley cloth with brown fringe!!! That interior designer was wacky. Anyway, hubby would not let me throw it away because the base was so cool. So it sat in storage indefinitely until I decided to try and reupholster the thing.

I cut off the cloth from the funky shaped lamp shade as best as I could to keep it in one piece. I used it as a pattern for the new fabric. I cut a half inch extra on the top and bottom of the shade to fold over the wire frame and a seam allowance to sew it together. I sewed the cover's front and back seam and slipped it onto the wire frame. I used hot glue to keep it as much attached as possible onto the wire frame and then I used hot glue to "hem" it to the top and bottom by gluing and folding over the extra half inch. Glue as close as possible to the frame and cut off excess because it will "show" for the light won't penetrate as well through two layers of fabric as it does with one.


Then I glued on braided cord and fringe. This project wasn't very cheap ($10 or so) because I wanted a particular fabric which was expensive, but now I have a lamp I am willing to use instead of take up space in storage.


So if you have a lamp with an ugly or torn shade that has a nice wire frame base, "reupholster" it.

Wednesday, January 14, 2009

Barbie Encyclopedia Mansion

As a kid, I even made do. Never got the Barbie Doll House I wanted, but I think I came up with a better solution anyway. I took our Encyclopedia set and made walls and rooms of any configuration imaginable. Each barbie had her own room, it covered the entire living room floor, sparsely furnished with whatever I had including makeshift beds and pillows from scraps of fabric. In fact, I like it better, it's easily put away and causes imagination to work.

If you don't have a set of Encyclopedias ask for them on freecycle, I am sure there are some sitting in dust in a basement with someone stewing over what to do with them beside throw them away. Or thrift stores often have a set from the 70s that they have priced under $5. A $5 barbie house is much cheaper then a cheapy plastic one that will fall apart within a few years of good use.

Tuesday, January 13, 2009

Homemade Laundry Soap

I have gotten around to making my own laundry detergent finally. You need borax (easy to find), A lye like soap (Fels-Naptha is most often used for this), and Washing Soda (not baking soda).

I searched all over for Washing Soda awhile back and gave up, but I did recently find it at a small grocery store that I had checked before but didn't have it at that time. They had all three ingredients: borax, Fels Naptha bar soap and Washing Soda, something tells me someone else in this town makes their own (wonder who it is!). I know they did not have this before, and when I used to shop there, I asked them to carry a cereal they didn't previously carry and they did, so I have a feeling someone asked them for this stuff. Washing soda seems to be fairly hard to find. If you can't find this stuff, go to your local Mom and Pop type grocery store and ask the manager if he/she would carry it. I bet they would!

Recipe: (I have read a few different ones, I settled on this one)
One bar of grated Fels Naptha soap, 1 1/4 cup borax, 1 1/4 cup washing soda.
Or - 1 cup grated soap, 1/2 cup borax, 1/2 cup washing soda.

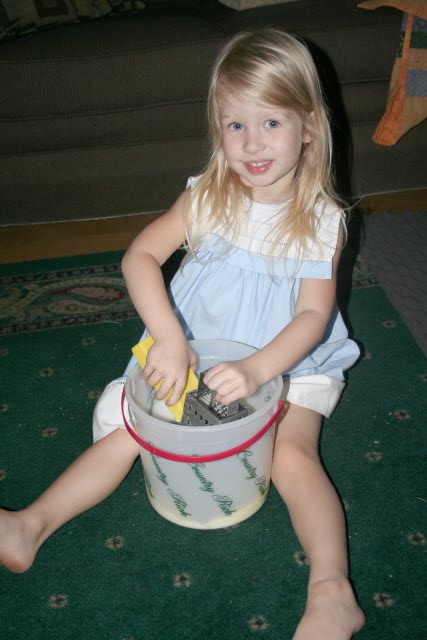
I grated the bar of soap, but when it mixed in with the borax and soda, the perfectionist in me said, "With those big flakes how can I get close to scooping out an equal proportion?"


So I threw the flakes in the food processor. Much better. I am storing it in an ice cream bucket.

or: UPDATE - you can use the side of the grater that looks like someone just punched holes in it. Never knew what that side was for, but it's perfect for making it into a fine powder dust, I no longer use the food processor.


I've washed my clothes with it and it is just fine. 1 T. for light soil, 2 T for heavily soiled. Does smell like Dial soap, but no biggie.

Here's the price break down.

I have been buying Charlie's soap, since I was unhappy with store laundry soap because things weren't getting clean anymore. For 80 loads at $15.49, it costs 19 cents a load.

Fels Naptha Soap = 99 cents makes about 2 1/2 cups grated = 40 cents/cup
Borax = $3.79 for 9 1/2 cups = 40 cents / cup
Washing Soda = $2.79 for 7 cups = 40 cents/cup

Cool, all 40 cents a cup! So no matter what proportion I make, it is 40 cents a cup.
16 Tablespoons equal one cup, so 2.5 cents for one tablespoon (recommended for lightly soiled laundry), 5 cents for two tablespoons recommended for heavy soiled laundry.

80 loads of Charlie's soap is $15.49.
80 loads Homemade soap is $ 2 - $4. Definitely worth the time to grate soap!

UPDATE: I have made this detergent using my normal bathroom soap bar, Ivory soap, which makes it cheaper and less fragrant. It works well, but not really for heavily soiled items like my husband's work clothes. So, I returned to using Fels Naptha.

UPDATE II: Unless you want to convert this into liquid soap by boiling it with water, this soap will leave linty like residue on your really dark/black fabrics. I'm too lazy to convert it (Find directions to make the above into liquid here, actually now that I type this, I'll go make some to see if it keeps the linty black from happening) until then I gave up and ordered Charlie's soap for my blacks.

Monday, January 12, 2009

Stand Out Nursing Cover

I made my own nursing cover that I thought was fairly clever before my girl was born, but she wasn't exactly a happy baby and really did not like the nursing cover because she did not want to be covered up. Long story short, didn't use any nursing covers.

But I have seen in the past year a few ladies using a cover that bows out in front so you can see in, maybe that would have worked with my kiddo because she could have seen out? I haven't seen one of these up close, but I overheard someone call it a hooter hider. You can google "hooter hider" and pay $30+ for one online or you can make your own. I am making this one for a gift for a friend, so I attempted to sew pretty.

Recall, I have never seen one of these things up close so this may not be an exact replica, but it is like.

First gather materials, cotton cloth (for breathability since you don't want to suffocate baby), a washcloth, some type of rings (I have curtain rings from Walmart Clearance ($1)), and the plastic binding from around big boxes of copy paper like you find at an office that does lots of copying. So total cost of project is less than one dollar since I only need two of the rings.

Then I cut the plastic binding in half, I wanted the apex of the corner to be my center. This was from a small box, so I left it that size, it basically reached from the middle of one shoulder to the middle of the other which I felt to be a good enough size. Then I unscrewed two curtain rings from their clips. I am betting I could find more options for this at a craft store, but I don't have one nearby. D-rings, I bet would even be better.

Then I cut a piece of material into a 30"x33" square, I made it slightly bigger than a receiving blanket and then my scrap piece of material limited me, but it is plenty big enough. I placed the banding at the top edge and after the initial hemming of the material, I hemmed a large hem all the way across big enough for the banding to slide into.

Then I slipped the banding into the hem and centered it. I think there was around 9" on each side. I pinned the edge of the banding and then sewed across the hem to keep the banding from moving.

Then, I got another washcloth because the baby washcloth I initially chose was worthless. Cut a washcloth in half creating two triangles. This will be sewn in the corners to wipe off little mouths.

So I placed a triangle in each bottom corner and hemmed up the bottom over the top of the towels.

Then I hemmed up the sides catching the edge of the towels. And then I sewed across the length of the towel (the hypotenuse for the math enabled) to keep it stationary.

Now, for the adjustable strap. I took two pieces of the same material, cut 3"x5" and 3"x30" The long one is a bit long, but easy enough to cut to whatever length you prefer. I folded each over and sewed them around the edges, turning the cut side in to create a hem.


Then I took the shorter strap and slipped it through the two rings and sewed them in. Then I sewed the ring strap right next to one side of the plastic binding and then sewed the long strap to the opposite edge of the plastic binding.

Then, since the fabric was so plain, I decided to try and use one of the two fancy stitches on my sewing machine to take away the blahness. I sewed little flowers down the center of the long strap and along the corners along the top line of the washcloth. The long strap to adjust, is first pulled through both loops and then through one loop. My curtain rings are kind of slick, so once it is adjusted you need to slip the strap through again to keep it from slipping.


And here is the finished project and the modeled use for it. Perhaps, I would shorten the plastic binding if I did it again, I think it is a little long and the weight sags it down some.

Friday, January 9, 2009

Make Your Own Bread Crumbs

I want my bread crumbs to be whole wheat which is healthier than the store bought bread crumbs, plus I always have bread heels left over, so I make my own bread crumbs.

When I have a leftover heel, I toast the heels in the toaster once and let them sit out for a day or two until they are nice and hard.


Then I break them up to fit in my tiny food processor.

Process until all is made into fine crumbs.

And pour into kitchen container.

I've bought bread crumbs once (as evidenced by the container), but the heels keep me well supplied. If you want to make a batch to start off with, just spread out a loaf of bread on some baking sheets and bake for awhile on some low temp in the oven, turning them every so often until they are pretty rigid. I then let them sit over night to make sure they are hard.

Thursday, January 8, 2009

Cereal Liner Wax Paper

Don't throw away your cold cereal liners. You can reuse them in applications that you used wax paper for that doesn't involve heat.

Open both ends. Then pull apart along seam.


Lay out flat and wipe off cereal dust. I have heard of people washing these things, but that is too much for me.

You can save them folded or you can roll them up onto a pringles can or some other long cylindrical item and rubber band it to keep it on.


Use for rolling out dough, sticking in between hamburger patties, sticking in between things that you don't want to freeze together, etc. Just don't cook with them.

I have also heard of people using these when still in bag form to coat meat with crumbs or any other thing you can think of for using heavy duty bags.

Wednesday, January 7, 2009

Free Sample Makeup - good concealers

I don't remember where I first heard about Eve Pearl's salmon concealer makeup, but I remember getting excited because I have horrible hereditary dark circles around my eyes. I have a fair complexion and my eyes look circled in brown that get worse at that time of the month. I watched YouTube Videos of her using the concealer and wanted some myself. Gasp! $42! Um, I can't bear to put up that much change for something that I haven't even tried! So I ran around town looking for some other makeup line that makes peachy salmon colored concealer. No luck. I gave up, but when a Christmas coupon for 20% off Eve Pearl rolled around, I went back to look and covet, but still couldn't make myself pay that much.

So, I started searching again and ran onto a makeup blog that made the same reference to wanting the really good Eve Pearl concealer which many on the board had tried with rave reviews, but not willing to pay for it. She said she found Everyday Minerals Pink and Sunlight concealer to make a salmon which worked well. She also said each worked well alone. So, I ran off to look at their concealers . They not only had the pink (Pick Me Up Pink) and sunlight that she was talking about, but peach (for darker skin) and a premixed peach and sunlight (Abbott's Perk Me Up) for lighter skin along with a myriad others with sample sizes only costing $2.5o. Now, I could fathom spending $2.50 to try something out.

Then, I saw that they offer a free sampler kit. So I got one of the concealers I wanted to try for free along with 3 foundations and a blush. They are internet based only which I have always loathed picking colors that I can't see but in a picture. In order to pick the foundation, their FAQs list a celebrity that would use that tone. So I got out a picture of me and searched for pictures of the celebrities in Google Images and when I seemed to "match" their skin coloring on several pictures, I considered that a good choice; I would not have picked those colors by the screen colors, so I think that was the best way to pick. So I payed for two samples and reasonable shipping $3.13. This is what I received.


They are wonderful little sample containers that I will have to save for putting in earring backs, sequins, eyeglass screws, homemade lip balm, etc.

I have to say I am impressed with this stuff. EVERY concealer and foundation worked well. I have still to decide which is the best ones because they are so very close and good. I will have to wait for an actual sunny day to do the daylight test. I cannot say that I have ever bought a range of foundations and had all of them work, it's always been which one was less evil.

Also, a little of this stuff went a long way.

Try it. $3.13 for sample makeup is a good fun deal, and you might just like it!

Tuesday, January 6, 2009

Onesie Refashioning

As a cloth diapering Momma, I am not in love with onesies. When she was little, what I had I just left open making her look sloppy. Or I would avoid them all together since one more thing to be fastening down there was not on my fun list of things to do. Also, you find 2T and 3T onesies that aren't handy during potty training time.

But I got them as hand-me-downs and stupid cheap 10 or 25 cent yard sale finds. So, I just convert them to shirts. This one I am demonstrating on will be more like a dress top since it is pleated.

Cut off the bottom as close to the top of the leg holes.


Fold in half to even it up.

Turn inside out and pin a hem. Then sew the hem.

And you now have a shirt.

Here is my lovely model.


This is as fancy as I get, but I have seen real fancy remaking of onesies, by cutting it up higher and making a dress with added material and matching bloomers. Quite cute.