Follow Me on Pinterest
Instead of posting links to Making Do Ideas on this blog now (I'll just post my own projects here though they are few and far between now), I'm now posting them on my Pinterest Board named Making Do Stuff.
You do not have to have a Pinterest account to see it.

Tuesday, June 30, 2009

No need for little swimsuits

Functional fixedness found me last week. In my stash of clothes that I store up when I hit good garage sales and get hand me downs, there was no 3T swimsuit. So, I put it on the grocery list. There were no more size 3 swimsuits at the store. So, I went and dug through a mountain of clothing at the thrift store. Literally a mountain, there was no organization to the newly-brought-in-from-recent-garage-sales kid pile. Found one 12 month swimsuit and a teen one. A brilliant idea struck; I could cut down the teen one! Then even more brilliant, I had an old one at home I hardly ever wore because I hate the color, I could convert that one! Then on the drive home, my brain informed me that a swimsuit isn't a necessary item. She can swim in her underwear/clothes in the backyard pool and even the lake. As long as I don't want to go to the city pool, I'd be wasting my money getting her a bona fide swimsuit if I was willing to waste enough gas to find one in this town.

So I filled up the fairy pool, put her in some panties and let her go. Daddy plopped in dressed as well and she was happy.

So, so glad I didn't put up a tutorial on how to cut down an adult swimsuit to fit a three year old and have someone comment that I could have just let her swim in her clothes! Functional fixedness -0 Me - 1 (Admittedly, almost too close to call)

Monday, June 29, 2009

Tractor Mower Blade Hat Rack

At camp this past week, I saw a cool recycling use for a tractor part. The camp grounds keeper had screwed up a mower blade from a huge tractor mower on the wall with the triangle points pointing up where the campers could hang their hats for dinner.

To make sure you know what I mean by mower blade, I found this picture to show you what blade I mean.

If these people just flipped it so the triangles were facing up, it could be a lovely hanging rack for hats.

Woohoo, 100 followers! Thanks for your all's interest in my blog.

Friday, June 19, 2009

Homemade Sugar Ant Trap

A neighbor of mine used this with success, and my honey in the pantry is being attacked, so I set out the bait last Friday.

Mix (mix it with something disposable that you will not be eating off later)

1 teaspoon syrup (or honey)
with 2/3 teaspoons borax (put don't use your cooking measurers, just eyeball it. If the ants ignore your bait your tipped them off by putting in too much borax)

Place in a little plastic lid (the lids off things the recycling place won't take anyway), not something you will eat off of later.

Place it near the parade of ants. The ants will swarm to the easy access food but not notice the borax and they will take the unsuspecting food home, feed it to all and poof! There goes the colony.

This should not be ingested by people or animals you want to keep, keep out of reach of children and pets.

Thursday, June 18, 2009

Conserve Dryer Sheets

Do you use dryer sheets? If so, conserve them. When you buy a box, cut all the sheets in half when you open the box. Then see if you can reuse the sheet a second time. This way you are getting double or triple the bang for your buck.

I did this when I used dryer sheets. Now I just line dry all year round and use the dryer only to get the last bit of dampness from my clothes if it is a humid day and they need to come off the line/rack before they are dry. The little time in the dryer doesn't require dryer sheets since the static offenders (wool, polar fleece, synthetic materials) are generally dry first and aren't shoved in to the dryer with the rest for the 10 minutes they are in there.

Wednesday, June 17, 2009

Wowser Wednesday - Toilet Paper Tube Candle Cover

Have some hurricane candles and a bunch of toilet paper tubes? Why not make a fancy covering for your candle? She has her pictures copyrighted, so you will have to wander over to A Little Hut to see it. But it doesn't look trashy at all!

Tuesday, June 16, 2009

Car Trash Bag Storage

In each of my cars' glove boxes, I have a toilet paper tube stuffed with 3 plastic grocery sacks. That way if I have a trash emergency or need somewhere to put wet clothing when I am away from home, they are ready when I need it and don't take up a lot of room.

Monday, June 15, 2009

Grocery Budget a Month Ahead of Time

I budget an entire month of groceries. For example by using all of June's checks for July, I have all the money for groceries for July on July first. (See my budgeting set-up)

This comes in handy for sales. I usually shop at store A, but Store B's flyer had my cereal for 50% off. Technically, they upped the price and then discounted, you have to watch for that. But it still saved a little over a dollar a box. So being the second week of the month, I bought 12 boxes (4 for each week) today to make it for the rest of the month. Saving about $13 dollars total. If I were budgeting weekly, I would have had to scrimp on other food to take advantage of the deal or not buy it. So, monthly budgeting can help you take advantage of deals at the grocery store.

Friday, June 12, 2009

Petroleum Jelly Uses - Add a few?

Need inexpensive eye makeup remover? Just rub on a bit of Petroleum Jelly and wipe off with a rag. No need for special stuff, this works great.

I also use petroleum jelly for chapstick. Not when my lips are chapped, but just because I am addicted to having something slippery on my lips.

Using up a big thing of Petroleum Jelly is yet something I have done. In fact, I think my mother is still working on the one she bought before I was born.

So, what other uses do you use petroleum jelly for? Please share!

Thursday, June 11, 2009

Pizza Box Art Storage

Wonder how to store all the lovely art work you get from your kids? Maybe a take out Pizza box would work well for you? Nice big space for pictures, paintings, collages; sturdy packaging to keep it from getting crushed and thin enough to fit in odd spaces, like under a bed. Just make sure to choose ones that didn't get pizza grease on it.

Wednesday, June 10, 2009

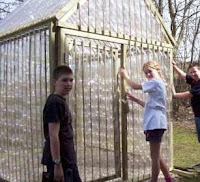
Wowser Wednesday - Greenhouse made out of Plastic Liter Bottles

I have to say, I have a greenhouse made from old windows already in the planning stage, but when I saw this, I was tempted to change my mind and make a greenhouse out of soda bottles, but then I realized I don't drink anything from plastic bottles so it would make it a real challenge to gather the materials, but if you have access to plastic liter bottles and want a greenhouse, look at these plans.

Tuesday, June 9, 2009

Microwaved Corn on the Cob

Any time you can use the microwave over prolonged use of the oven or stove it saves energy. (It is best to run smaller appliances for short times versus large appliances for long times) But with the microwave the quality of food is generally worse, but I have found that it doesn't suffer when cooking corn on the cob at all!

Prepare corn by taking off leaves and silks. Run the cob under tap water. Wrap in wax paper. Microwave for 5 minutes for 3 ears of corn. That's it, basically steamed corn. It does waste wax paper, but I am fairly certain the cost is less than boiling the corn in water and the nutrients would stay in the corn instead of leaching into the boiled water.

Monday, June 8, 2009

Formal Dresses for Dress Up Clothes

I have always wondered at the thought that went through the thrift store employee's mind that thought pricing fluffy out-of-date 80s prom dresses/wedding gowns for $20+ was a good idea, but I have been on the look out for the the frilly 80s dresses believe it or not. My mother's boss when I was a teenager, cut down a few prom dresses to fit her kid, which I thought was neat, but this lady is an actual knows-what-she's-doing sewer.

But, since I have been keeping my eyes peeled this last year for formals to do this with, not knowing how well I can refashion them, I made a deal with myself that I would not consider any above $5. Amazingly, I spent no more than a dollar on any of the 8 that I picked up and one just happened to fit me which I like! Since it was in the dollar bag sale and it evened out that I got it for 3 cents, it hangs in my closet for sheer silliness. Not that it has the chance to see the light of day, but one can hope.

Anyway, so I had 7 dresses that either didn't fit me if they were nice ones or awful 80s poofy things and a lucky find of a flower girl dress. I have been debating on how to do this, because I don't want to make them all so small for my (almost) 3 year old and then have to go through the whole process again for her when she gets bigger, plus, I don't think I am skilled enough to really cut them down to size. So, how to sew them so the 2 year old can play in them, but still be salvagable or resewable so that they grow with her?


Basically, I did 3 things to the dresses. I took all the bodice seams and folded them up and sewed them in about 2 inches. Each dress has two seams in front and two seams in back. That makes most of them fit the size of a 2-5 year old (they are a bit big on the 2 year old). I am doing all my sewing in a color that doesn't match the item so that in a few years when I have to let these things out, I can easily identify the seams to rip.

Then I took the bottom of the dress if it was a long one and pulled it up inside the dress to the waistband of the dress and just tacked it there with about 2 inches of sewing. This makes it able to be a dress where my kiddos feet can poke out, capable of walking around in it, gives her a train (what girl doesn't want a train?) and yet I don't have to cut it and I can let it down as she gets older.

And then I had to bring in the sleeves somehow. Each dress was different. The one with the spaghetti straps, I just tucked in the straps and sewed the shoulder pieces together, a few I tacked it down onto the neckline, but most of them I just folded the shoulder down, creating a loop and tacked it together so that the arm hole is smaller, but the sleeve isn't cut. The seam will just have to lay back against her shoulder. I hope that is as clear as mud. The arrow furthest right shows the sleeve gather, the other two show the 2 inch seams around the bodice.

Hmmm, wonder if anyone but me understands that picture!

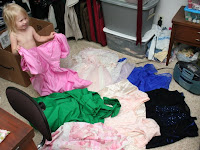
Here's a room full of dress up clothing, my child's favorite activity, now complete with two handfuls of formal dress up clothes.

And here's the happy model in a several of them.


Friday, June 5, 2009

The Sad Loss of Sewing Know-How

As I have started into living simply and frugally, I have found that skills that all of our grandmothers most likely possessed have almost vanished from the skill set that we have been given as kiddos now venturing out into life. My mother knew how to sew, and I was given the simple knowledge of how to do that. Nothing in depth, but it was enough for me to venture out into the world of sewing which I find almost to be a necessity for frugal minded folks.

Don't be intimidated. Pick up a machine (I got an older model at a thrift store for $20 and a electronic one for $40 at an auction) and play! I had to buy a manual for the Elna machine I bought, since it didn't come with the item, and I couldn't figure out how to thread it. I don't remember where I bought it from; I think it might have been this one, but you can get manuals for second hand machines though you may have to pay. This site may help you find a manual as well.

I really have to say that the basics I was given at home and the making of play clothes and other items that I wasn't too worried about looking sloppy, has been what made me confident enough to refashion a sentimental item of clothing into something I would wear in public. I don't think I would have attempted it a year ago even. And I know I still have a long way to go in learning how to sew well.

I think it would behoove anyone to learn how to sew. Hopefully you have a mother or grandmother that could teach you; I bet they would be happy to do so! If not, you can always learn the basics and play until you build up your confidence. Look up community college classes if that is available to you or below are some free instruction books on pdf. I am actually wanting to follow the old hand sewing books from 1901 and 1915 when I get the time! I have also easily picked up old sewing books from like the 1960s (maybe there was a big rage for learning to sew back then?) that have lots of in depth instructions on sewing. Like how to do every kind of pleat imaginable to vinyl bedspreads for your child's room. Ok, so most of the designs are way outdated (who would ever want a vinyl bedspread!) and make you wonder why anyone thought that was cool, but all the information on how to sew arm holes and pleats and such is worth a quarter at a garage sale!

Machine:
Free Sewing Book for Beginners

Hand:
Hand Sewing Lessons

When Mother Lets Us Sew

And remember, if you know how to sew pass it on to the next generation!

Thursday, June 4, 2009

Altered Dress Qi Pao

I had two traditional Chinese dresses (Qi Paos) made for me while I was in Dalian 10 years ago. Either the tailor didn't understand my Chinese or decided what I asked for was odd and shouldn't be done my way, but my white silk dress turned out looking like a wedding dress. A wedding dress that made me look like a cow.


I decided that ten years in the closet was silly no matter the sentimentality, so I decided I was going to alter it into a shirt so it might see the light of day. I chose a day when hubby wasn't home since I knew he wouldn't be too happy because he liked the thing. I put it on over the slacks I thought I would wear with it and rolled it up to the length I liked and pinned each side to tell me where the length I liked was.


I then placed it on my dress dummy, the first time I used my present from my mom. (If you want to make your own dress dummy, if your mom doesn't surprise you with your own, see this post.) I used a measuring tape to make sure the pins I stuck in where the same length from the arm pits and then used the tape again around it like a belt which I used as a guide to put pins all the way around the dress where I was to cut it off. My two year old was begging to get the "pretty princess dress" off the dummy so she could wear it, unfortunately with the next step that I am about describe she burst into tears and was no longer happy with Momma's sewing project.

So, I cut off the fabric with scissors about an inch below the pin line. I hesitated for a bit knowing how not-so-great a sewer I am, but decided to be brave. The kiddo was not thrilled with my bravery.


Then while still on the dummy, I flipped the hem under and pinned it to visually see that it was nice and even.

Then I ironed the flipped edge flat. Did the first sewn hem around it, this time going slowly and carefully in the machine instead of the maniacally fast sewing I generally do. Then I cut off all the excess fabric and rolled the hem up and rehemmed again so that the fabric didn't unravel. I have to say I was pretty proud of my first real hemming job, it looks good on the outside AND the inside.


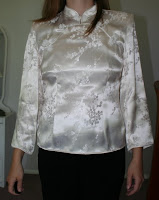
And there you have it:


Still maybe not the most flattering, but I think I will actually wear it out now!


Wednesday, June 3, 2009

Wowser Wednesday - Knit Clothing with Plastic Bags

Somehow I don't think this would be very comfortable, but still, wow! She knit these outfits from plastic grocery bags. I doubt any of you will have the time for such a silly project, but they are cool to look at.

Ooo, Ooo! I am thinking . . . . doll clothes! Huh? Huh?

Visit the whole album by Cathy Kasdan.


Tuesday, June 2, 2009

Cinderella Dress

My child is obsessed with Cinderella and the Cinderella dress-up gown, which she doesn't own, a friend does and she constantly wants to visit. More to put on the dress than play! So I set out to make one.

First I gathered up like materials (I won't be using the tulle and dark fabric and added a white turtleneck to this mix) and a similar dress to help me visualize. I did want to make it a bit large so she could play in it for a long while.


I cut out two rectangular panels for the skirt, two small rectangular panels for the sleeves, a v-shaped cutout for the front "panel" and cut out the front chest of the shirt.


For the front fake panel, I pinned on the v-shaped panel onto the front shirt piece folding under the edges. And sewed it on.

After that, I cut out some lacing to border the panel. Zigzagged that on the edges.


Then I turned the piece inside out and sewed up the bottom quarter to create arm holes.

Then for the sleeves, I pinned them on the front of the bodice like the picture. I started in the middle and pleated as I went. I sewed over these pleats.


Then after the pleated portion of my sleeve was sewed on, I took the bottom of the sleeve and pinned it on down the sleeve hole and sewed it on.


Then for the side Cinderella poofs, I cut off the sleeves of a white turtleneck and rounded the tapered end and then cut it flat across the top.


I hemmed the sleeves which made them ruffled. Not sure how to not do that with a knit fabric maybe some seamstress reading this will enlighten me, but it worked with the theme. Then I centered the sleeves on the sides of the skirt and sewed them on.


Then I turned the skirt and bodice inside out and pinned the center of the sleeves at the side of the bodice and pleated the skirt until it all fit inside the waist. Then I sewed on more lace at the waist to cover up my ill sewing to get the finished product.


I have to say, even though I know she was just quoting Cinderella from the movie, it feels nice when your toddler won't stand still to take a photo in her new dress, but twirls and twirls saying, "It's like a dream, a dream come true."


Monday, June 1, 2009

Scrap Toddler Onesie Dress

My child believes she is a princess. And real princesses only wear dresses. So, coupled with her aversion to wearing any kind of two piece outfit and my hatred for onesies (not good for cloth diapering or potty training - the only two modes I have ever been in with my kid), I set out to make her a dress with scrap materials to add to her wardrobe.

First, I scrounged around for my outfit in all my salvaged craft supplies. A free onesie hand-me-down, a ribbon off of a birthday package, a stained yellow tshirt and a button that I salvaged from a shirt before throwing it in the rag pile.


I used the side of the shirt since I was trying to avoid the tar like stain that had landed the shirt in the material pile. I folded the onesie in half and laid it on top of the shirt.


Then I cut out a skirt of two pieces, slightly larger at the waist to allow for seam allowance. If you are hoping for a pattern there isn't any, I just cut till I liked it. I would hold it up every now and then to see how it fell and when it looked good, I quit cutting.


I then sewed a small hem along the bottom of the skirt pieces and then sewed up the side edges of the skirt making sure the hem s were on the same side as the side seams. I then turned the onesie inside out as well.


Then I pinned the shirt edge to the skirt edge all the way around making sure the side seams of both the shirt and the skirt matched.


I turned the dress inside out and if you want to you could end there. But I had matching scraps to add!


I wanted to make a faux bow in the middle of the waist, so I marked the center of the ribbon and made loops of the same size next to it (picture will explain) and pinned it to make sure I had it centered right. (BTW, she was determined to be a princess hand model. Every time my camera was brought out, she insisted her hand be photographed, in case you are wondering why her hand keeps showing up, I couldn't always crop it out!)


Then with matching thread I tacked it right in the middle with a few sewing machine stitches.


Then I pinned the ribbon on the dress with the faux bow in the middle. My hand model distracted me a lot at this point and unfortunately, it turned out a bit off-centered. (Oh, well, it's purpose is to be a play-in-the-mud dress anyway.)


Then I sewed along the top and the bottom of the ribbon and folded the ribbon ends under so that the ribbon ended at the dress's seams.


Then I hand sewed on a button in the middle of the faux bow.


Here is the finished dress.


And the hand model princess checking it out and striking a pose.


Maybe one day the MakingDoMom will learn how to sew for real, but for only 20 minutes worth of work, I'm happy with it. For really dressy dresses, I'll buy them at the thrift store already put together!