Follow Me on Pinterest
Instead of posting links to Making Do Ideas on this blog now (I'll just post my own projects here though they are few and far between now), I'm now posting them on my Pinterest Board named Making Do Stuff.
You do not have to have a Pinterest account to see it.
Showing posts with label Baby Projects. Show all posts

Monday, August 9, 2010

Free White House Greetings

Happy Bday to my big 4 year old girl!

If you want a greeting card or congratulations card for your baby from the White House,

Or these special times too:
  • Wedding (send your request after the event)
  • Baby's birth or adoption of a child
  • Retirement after at least 30 years on the same job
  • Eagle Scout Award
  • Girl Scout Gold Award
  • Bar/Bat Mitzvah or equivalent religious occasion
Follow the directions here.

My first baby was welcomed by George and Laura Bush, hopefully come Thanksgiving, I'll be able to ask for Barack and Michelle Obama to welcome my tiny bundle. You'll simply receive an embossed stationary card with their ink stamped signatures, but someone takes the time to hand-write the address. A little bit of fun for your scrapbook to be had for the cost of a stamp. I'm curious to see if the sentiment changes with presidents.

Tuesday, August 4, 2009

Baby Sensory Tag Toy

I'm needing to make a number of baby gift items here lately, and one idea I had was a tag toy. I know how babies love on the tag of a stuffed animal, so a stuffed animal with tons of tags would be an even better toy, right?

I saw this tag monster and then this simple square tag toy with crinkly cellophane for noise. (I had planned on using a cereal bag liner instead of cellophane, but the contrast of fabric textures of my scrap choices made me decide it might be sensory overload, so I didn't put it in.)

But I want to use real tags. Repurposed tshirt tags from my tshirt fabric pile and other scraps with different feels because I'm all about making do with what I have in the pile.

So I cut off a handful of silky t shirt tags (nicer shirts don't have these tags, bummer),grab a pair of silk pajama pants and a polar fleece scrap from the fabric pile.


Then I cut a square of each fabric. On one square I arranged the tags somewhat symmetrically on the square pointing in. I tacked those down onto the yellow square. Don't stick the tags all the way to the corners, so you don't have to cut them out of the corners like I did.


Then I put the right side of the other square facing the tag side of the other square, leaving a gap to turn the item right side out.


Then after turning outside out, tack it all down around the edges and close up the hole to finish.

Making Do may not be the most aesthetically pleasing, but I think it's cute. And my three year old has already taken to fingering it, polar fleece and fake silk is a good combo.

Monday, July 20, 2009

Homemade saline nose spray

Reading my Toddler's Magazine, "Turtle," has given me today's post.

Dr. Cory says: (Who is Dr. Cory? Not sure, but she or he gives medical advice to 2-5 yr olds.)

For kids under 6 who should not be given cold medicines, Dr. Cory suggests using a saline nose spray or dropper to clear up congestion.

The doctor says if you want to make your own, mix 1/4 tsp salt with 1 c. water

Monday, May 11, 2009

Homemade Pedialyte

My mother's day gift was a trip to the ER with my toddler who had an ear infection, but I came away with a Making Do tip straight from the ER doctor.

Instead of Pedialyte or Gatorade (these have artificial ingredients) for a vomiting or high fever child, he just takes a small glass of water and puts in three pinches of sugar and three pinches of salt. He uses this for his own kids instead of the pre-made expensive stuff.

Monday, March 16, 2009

Cheap Thank Yous

With all the baby gifts I received or the birthday gifts my child received, I wanted to send out Thank yous, but fun ones and in post card form to save on postage.

So, I would take a picture of her wearing the outfit or playing with the toy and then open it in printshop software to make a postcard, or I just make the photo about the size of a postcard, write on it with my photo software and print it out on card stock. I cut it out and address the other side like a letter. I think it is much more fun to send a thank you note to the person with a photo of your child playing with the item. And because I hate being serious, I write something silly on the cards, when my kid gets old enough, I will have her write the actual thank you.

Example:

Friday, March 13, 2009

Reader Suggestion Friday: Cheap Birth Announcements and Christmas Cards

My Follower, Dani', recently had a baby (Congratulations!) and wanted to find a cheap alternative for baby announcements. For my own baby announcements 2.5 yrs ago, I made my own card on the computer and included a 4x6 photo hand cut to fit in the envelope - I got 50 free 4x6 photos from shutterfly I believe - and slipped it in the card. I don't have my cost breakdown from way back then, but Dani' looked at Shutterfly and looked around for a cheaper alternative. She found a Vistaprint sale.

I had not heard of Vistaprint, but these kind of online photo product people have some pretty fierce competition. I know of many: Shutterfly, Snapfish, Winkflash, Walmart and MPix (MPix caters to professional photographers so they are not as cheap as the others, but if you want quality on an important photo, I included this in my list; I got a big 14x16 from them once.) I am sure there are others. Besides MPix, these companies often run lots of sales, certain # free, % off, etc. Sign up on their email lists and monthly you'll get sale flyers in your inbox from them.

When I chose to physically scrapbook my child's first year, I collected all the different offers from the groups and took advantage of them. I used winkflash, snapfish, walmart and shutterfly to get as many as I could for as little as possible. Just for grins, I bought one of the same photo from each place to compare them. None of them looked bad separately, but from the line up, I remember winkflash's colors were pretty bad, so I took myself off their list although they had some of the cheapest prices (guess that's why). The other three were comparable, there were color differences, but I couldn't decided if any were better or truer than another.

The Christmas before last, I used the postcard feature of one of these companies to make Christmas announcements and like Dani' created my own background. Well actually, what I did was chose the layout of one picture next to the wording and in Photoshop Elements created the the "picture" by laying out several photos. I made my own layout because I didn't like any of the options for my photos. Here's my 4x6 "photo" that I made in Photoshop to put in the photo slot next to the wording and the finished card.


I'll let Dani' explain her own process. I liked how she calculated every part. That is smart shopping.

"My friend had a baby about a month before I had mine. She sent out these cute birth announcements from shutterfly.com, which I thought was a great idea. I went to the website to check out prices, and found the cheapest was $.55 per card, but only if you ordered 255 or more. We have a big family, but not that big. In smaller quantities, the cards cost even more. For 50 birth announcements, it would cost $39.50 ($.79 per card) plus $6.99 for shipping, for a total of $46.49. This adjusts to approximately $.93 each. Add a stamp for each one, and you're well over a dollar for each card.

Then I got an e-mail from Vistaprint.com, which I have used to advertise my Etsy shop. They were having one of their mega sales, which they have just about every week, and I saw that I could get 50 free jumbo postcards. You can use one of their pre-designed layouts, which don't work for baby announcements since they're all for advertising. However, there is an option to upload your own design for $2.49.

After some wrangling with Paint Shop Pro (you could use Photoshop, Paint, or any other graphics program, I even made a decent one in Word 2007), I came up with a nice design (it has to be 8.5 inches by 5.57 inches and at least 300 DPI resolution) and uploaded it to Vistaprint. When I checked out, I selected the slowest processing and shipping option possible, which says it takes 21 days. That cost $6.37, for an order total of $8.86, a savings of $37.63 over shutterfly. Each card essentially cost 18 cents.

As for the "slow" speed, I placed my order on Feb 24th and it shipped on Feb 26th. I received them in the mail on the 28th.

I also liked that I got to make my own design, rather than settle for the limited selection of cutesy baby designs at shutterfly. For someone who is handy with a graphics program, these will work for Christmas cards, party invitations, you name it. Just be sure to read everything. Vistaprint makes its money off of shipping, additional options (like uploading your design or adding a color backside to the postcards), and offering you "matching" products at every step. Just turn down all special offers and you've got a frugal way to announce the big things in your life!"

Here's her card:


BTW - she has a blog post on how she downsized her own jeans to fit her toddler boy. Very cute with skull applique.

Friday, March 6, 2009

Reader Suggestion Friday - Reuses for Wool Sweaters

I have to say that t-shirts and wool sweaters have become a "staple" in my craft piles for making do. Every time I see one these for cheap or free, I pick it up even though I have a pile at home. Someone who just joined my blog is enamored by wool sweaters too and collects reuses for them on her blog; she's enamored enough to sell them for those that want them but live in an area where they are hard pressed to find them (i.e. Florida). Her blog, Resweater, lists some projects that she has found others using old wool sweaters for. The below links are a few I think that are within my sewing skill level and are practical that I liked. (I'm not one for artsy/decor stuff, but there are projects highlighting that too if you are interested.)

Mix and match Child Cardigans

Wool Berets

Ice Scraper Cover - Gotta do this one

Rag Rug - Really nice, I'll have to do this one too sometime in the far far future.

I'm planning on someday making a crazy quilt with all my scraps that are too small to do anything with, but I know that will be ages from now considering how much time that will take!

Monday, January 12, 2009

Stand Out Nursing Cover

I made my own nursing cover that I thought was fairly clever before my girl was born, but she wasn't exactly a happy baby and really did not like the nursing cover because she did not want to be covered up. Long story short, didn't use any nursing covers.

But I have seen in the past year a few ladies using a cover that bows out in front so you can see in, maybe that would have worked with my kiddo because she could have seen out? I haven't seen one of these up close, but I overheard someone call it a hooter hider. You can google "hooter hider" and pay $30+ for one online or you can make your own. I am making this one for a gift for a friend, so I attempted to sew pretty.

Recall, I have never seen one of these things up close so this may not be an exact replica, but it is like.

First gather materials, cotton cloth (for breathability since you don't want to suffocate baby), a washcloth, some type of rings (I have curtain rings from Walmart Clearance ($1)), and the plastic binding from around big boxes of copy paper like you find at an office that does lots of copying. So total cost of project is less than one dollar since I only need two of the rings.

Then I cut the plastic binding in half, I wanted the apex of the corner to be my center. This was from a small box, so I left it that size, it basically reached from the middle of one shoulder to the middle of the other which I felt to be a good enough size. Then I unscrewed two curtain rings from their clips. I am betting I could find more options for this at a craft store, but I don't have one nearby. D-rings, I bet would even be better.

Then I cut a piece of material into a 30"x33" square, I made it slightly bigger than a receiving blanket and then my scrap piece of material limited me, but it is plenty big enough. I placed the banding at the top edge and after the initial hemming of the material, I hemmed a large hem all the way across big enough for the banding to slide into.

Then I slipped the banding into the hem and centered it. I think there was around 9" on each side. I pinned the edge of the banding and then sewed across the hem to keep the banding from moving.

Then, I got another washcloth because the baby washcloth I initially chose was worthless. Cut a washcloth in half creating two triangles. This will be sewn in the corners to wipe off little mouths.

So I placed a triangle in each bottom corner and hemmed up the bottom over the top of the towels.

Then I hemmed up the sides catching the edge of the towels. And then I sewed across the length of the towel (the hypotenuse for the math enabled) to keep it stationary.

Now, for the adjustable strap. I took two pieces of the same material, cut 3"x5" and 3"x30" The long one is a bit long, but easy enough to cut to whatever length you prefer. I folded each over and sewed them around the edges, turning the cut side in to create a hem.


Then I took the shorter strap and slipped it through the two rings and sewed them in. Then I sewed the ring strap right next to one side of the plastic binding and then sewed the long strap to the opposite edge of the plastic binding.

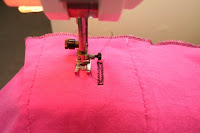
Then, since the fabric was so plain, I decided to try and use one of the two fancy stitches on my sewing machine to take away the blahness. I sewed little flowers down the center of the long strap and along the corners along the top line of the washcloth. The long strap to adjust, is first pulled through both loops and then through one loop. My curtain rings are kind of slick, so once it is adjusted you need to slip the strap through again to keep it from slipping.


And here is the finished project and the modeled use for it. Perhaps, I would shorten the plastic binding if I did it again, I think it is a little long and the weight sags it down some.

Tuesday, January 6, 2009

Onesie Refashioning

As a cloth diapering Momma, I am not in love with onesies. When she was little, what I had I just left open making her look sloppy. Or I would avoid them all together since one more thing to be fastening down there was not on my fun list of things to do. Also, you find 2T and 3T onesies that aren't handy during potty training time.

But I got them as hand-me-downs and stupid cheap 10 or 25 cent yard sale finds. So, I just convert them to shirts. This one I am demonstrating on will be more like a dress top since it is pleated.

Cut off the bottom as close to the top of the leg holes.


Fold in half to even it up.

Turn inside out and pin a hem. Then sew the hem.

And you now have a shirt.

Here is my lovely model.


This is as fancy as I get, but I have seen real fancy remaking of onesies, by cutting it up higher and making a dress with added material and matching bloomers. Quite cute.

Thursday, December 4, 2008

No Pin or Velcro Adjustable Prefold Cloth Diaper from Old T-shirt

I was inspired with my new surger while fixing diapers to figure out some way to not have to use a fastener anymore.

Pins aren't fun with a squirmy baby.
Snappis won't hold the t-shirt material so I was thinking of attempting adding snappi material like the Fern and Fairie site instructions.
My velcro belt fastener is the best I had come up with, but sometimes the middle material would slip out if not fastened tight enough or baby is starting to get big enough that there isn't much material to hang onto up above those baby hips.

So, I saw these instructions for adding ties for orphanage diapers, but that essentially would leave me with the same problem as the velcro belt. But! If I make the ties somehow hold onto that middle section of diaper then there would be no problem. This is my new design.

First, make a prefold diaper from an old t-shirt like I show you here.

Now, take (2) 13"x2" strips from some of that leftover t-shirt. (Or use a contrasting color t-shirt if you want to be super cute about it.)
Fold over that 2" strip and zigzag or surger the edges. My pic just shows 3 edges done, but I did all 4 edges later when I decided it looked prettier.


Then zigzag a square to attach about an inch of the strip onto two opposite corners of the diaper.


Now, measure the distance of your first knuckles on your index and thumb when scrunched together like so. If your hubby has bigger fingers, measure his distance.


You will need to make the buttonholes this wide. I learned the hard way by just making it the size of the strings, your finger width is more important! All subsequent button holes are now sewn larger! You are going to sew 2 large buttonholes an inch down. For adjustable diapers for newborns to toddlers, measure 5" down from the top as well and place another set of buttonholes. (I based this on the Curity Velcro Pinless Diapers that Mom had that you can't find anymore that have made it from newborn to 2 years old for me, so I figure that was sound engineering to steal from.) This will make a leak spot if you don't use liners, but I have never not used them, so I don't care, it's not that great a gap as it is.


Now you are ready to fold the diaper. Normal fold for a prefold. Take one string through both button holes and then do the same for the other.


Now tighten to fit baby.


Tie in pretty little bow. Here's my two year old wearing it (She's wearing it as a "Let's do the Twist" Fold - don't think it would work on the smaller newborn sizing.)

For a newborn, First fold over the top of the diaper to be the size you need, and fold and tie in the same way.


Monday, November 17, 2008

Flat Fold Cloth Diaper made from T-shirts

So, I had gotten lazy and attempted using my first "flat fold" diaper by using a t-shirt. The neck hole and sleeves of the t-shirt plus it's rectangle shape made it a bit bulky. It would be a good emergency use item, but not sure I would be happy with it long term. So, liking the fact of not needing liners with the origami fold, I wanted to make a flat fold diaper.

First I took two t-shirts of roughly the same size.

I cut off the hem and cut up the sides where I wouldn't be cutting off into the sleeve.

Then I folded up the corner to make a square to give me a guide to cut it. (I am making these squares roughly 20" each for a toddler diaper.

Then I sewed them each to each other. Quite simple and I didn't bother hemming or tacking down the seam for they will be folded up in the diaper anyway.

I folded the seams to the inside in the origami fold.

And here is my kiddo in it. Lots less bulky and the front strip can extend further up the front. So this did fix the problem when I just folded it using an uncut t-shirt.